With the continued arctic cold this week, I didn’t really want to do much of anything. I’m not sure what I was thinking when I challenged myself to a weekly Arts & Crafts Cleanout article, but having that deadline in the back of my mind helped me push through the blahs. So when I looked at the calendar yesterday, I realized I need to get Valentine’s Day Cards on my website now if they’re going to be of use to anyone.


Back in November, I purchased a package of 100 folded, approx. 4 x 5.5 cards cheaply on Amazon. Never again! The cards don’t match any standard size even though they were listed as A6 and neither of my printers will recognize their sizing. I wasted about 20 cards trying to print some of my holiday images before Christmas and then just gave up and put the entire box in my to-be-dealt-with-later pile. Next time I’ll buy the cards I normally purchase from Michael’s 10 cards for ~$4.99 or Hobby Lobby 50 cards for ~$7.99 (the quality is just a bit different between the two.)
Those odd sized cards are now going to be my go-to cards for original card designs. The cardstock is not super heavy but if I don’t try to do a full page design of watercolors, they should be fine 😊
Stamped Watercolor Cards
Working on 3 cards simultaneously = ~ 20 minutes.
If drawing is not your forte, but you want to create your own cards, try stamping the design and then use watercolor, marker or ink to put in the color.
These turned out really cute 😍 and I’m going to make a large batch this weekend to add to the store.
Gel Plate Cards
Not an easy process for just one card at a time, I find it easier to create a background with the gel plate and then Photoshop on the message and print with my Laserjet.

Online video’s of using these gel plates show a quick process which lured me into buying a set from Michael’s, Gelli Arts Gel Printing plates both 5×7 and 8×10 . However, the videos rarely show how many supplies you need or the washing of the brayer in between colors. There is also plate drying time between colors and sometimes the paper just doesn’t peel off the plate well, so there’s plate cleanup before you can start again.
Don’t get me wrong, I LOVE playing around with colors and shapes on the plates, but I have not had a lot of success with photo image transfer and finished artwork straight from the plate.
I’m not sure if I would call my gel plate experiment a success but the steps are all there. I liked the individual 5×7 background at the end much better than the card prints, even though it was the same supplies, colors and process.
Mending
Time Spent: An entire evening, so ~4-5 hours.
Mending is not my favorite pastime, but I am learning that a little bit of ingenuity can save a lot of frustration and money. So if I have to purchase a bit or bobble, here and there, to get through my mending pile, I’m going for it.
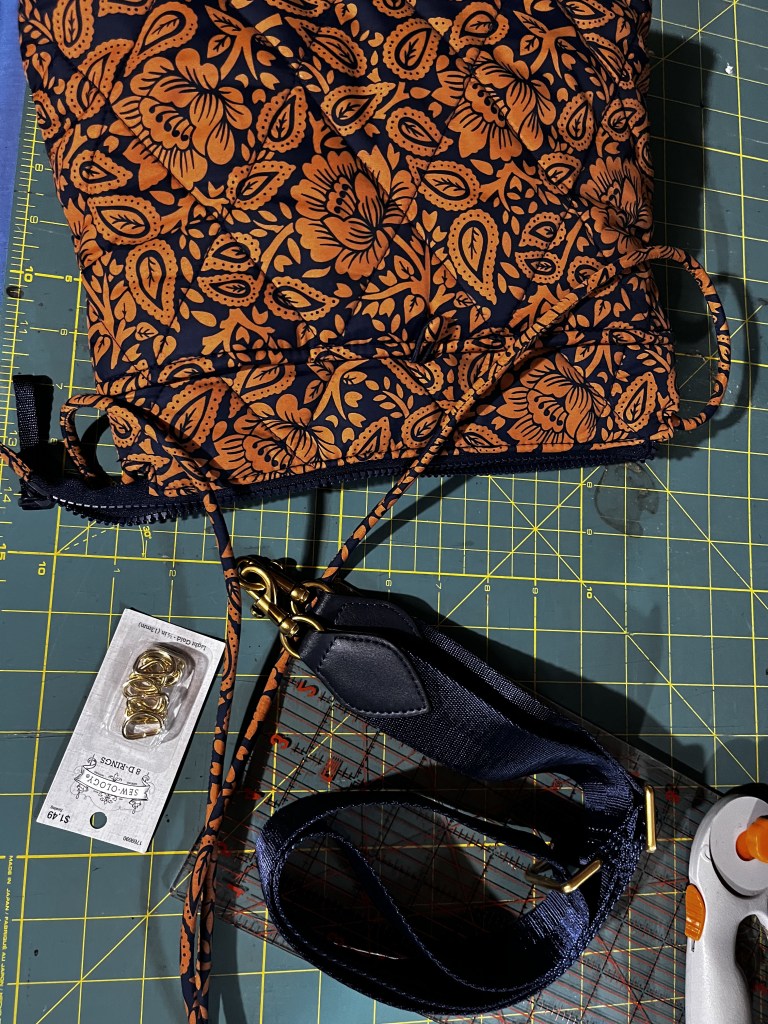
I purchased supplies long before the holidays to fix a coat with too short sleeves and a cute purse with a miniscule crossbody strap. It was definitely time to get these projects finished.
- I bought a new coat for this winter and the manufactured sleeves are too short for the human body when you wear a sweater or hoodie and they have no real cuffs. My wrists (and part of my forearms) were freezing 🥶 as the temperatures dropped. This fix took a bit of brainstorming because both the coat mini-cuff and the actual cuffs I purchased were different sizes and already stretchy on their own. BUT they turned out great and I am so very pleased with my new coat.


- I also purchased a cute crossbody bag that matches the coat. My current one was teal and clashed terribly. However, the strap was a flimsy single cord that tried to behead me every time I put it on. Had to be changed over to an adjustable strap. Another project that I absolutely LOVE. I wouldn’t have bought the purse if I didn’t love the look, but with the new strap it’s fantastic.


Hope you’ve gained some ideas for projects from my Week 2. Keep warm and see you next week.
Cara